Kitchen Scrap Gardening: Regrow Green Onions, Lettuce, and Herbs on a Sunny Windowsill
Don’t toss those onion ends and lettuce cores. With a jar, water, and a little light, you can regrow fresh greens right on your windowsill.
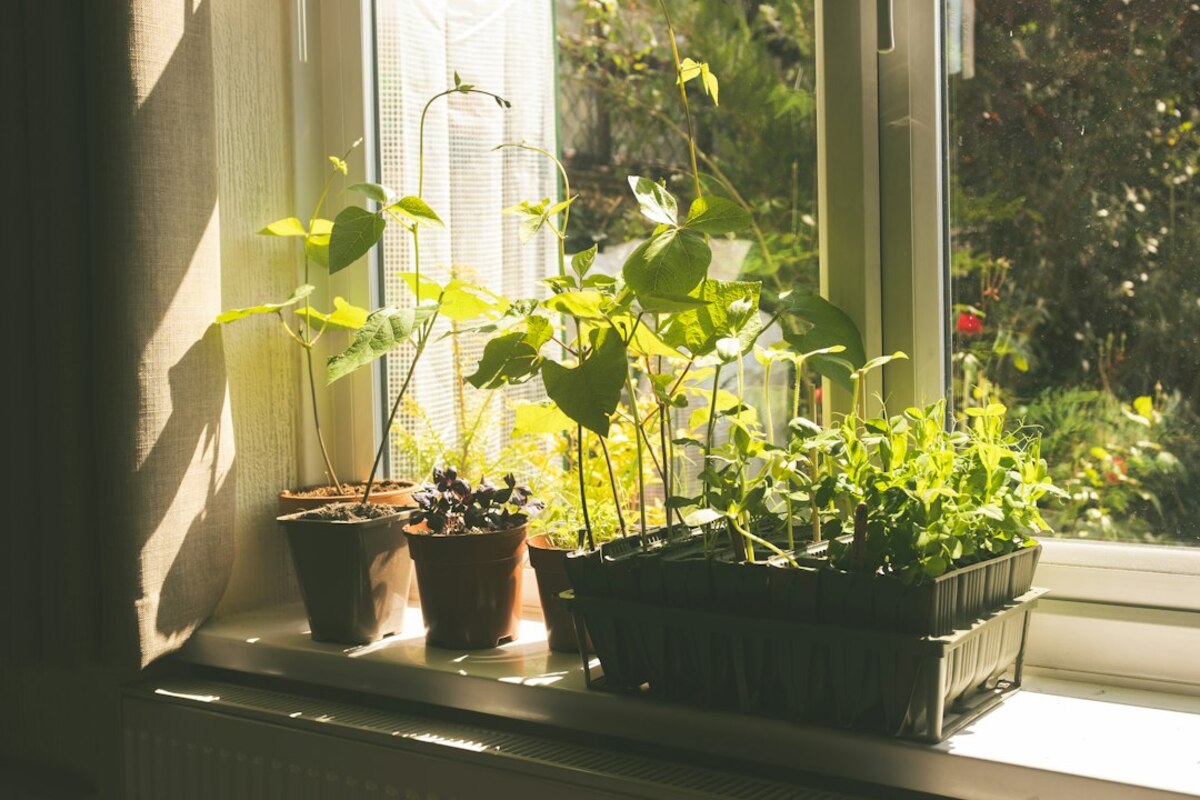
- Many everyday scraps (green onions, romaine, celery, basil) can regrow with just water and light
- A few simple habits—clean water, enough sun, and timely potting—prevent mushy failures and weird smells
- Regrowing won’t replace a full garden, but it can stretch groceries and make cooking feel instantly fresher
Why kitchen-scrap regrowing is suddenly everywhere
It starts the same way for a lot of people: you’re cooking dinner, you slice up green onions, and you’re left holding a small white “root end” that looks too alive to be trash. You drop it into a glass with a little water out of curiosity… and by the next day it’s standing taller. It feels like a tiny magic trick that happens on your counter.
Kitchen scrap gardening has become a popular, talk-about-it-with-friends kind of gardening because it hits a sweet spot: it’s low commitment, it works in apartments, and it gives quick results. It also scratches a very human itch—the satisfaction of getting “one more use” from something you already paid for.
Think of it like charging a phone. The plant has stored energy and structure (a “battery”) in its base. When you give it water and light, it can push out new growth for a while using what it already has. Some scraps will keep going for months if you eventually pot them in soil; others are more like short-term countertop projects that give you a few extra harvests.
Before you begin, one expectation helps: regrowing scraps isn’t about turning one onion into an endless onion factory. It’s about small wins—fresh garnish for soup, a handful of herbs for eggs, lettuce leaves for a sandwich—right when you want them.

The easiest scraps to regrow (and how to do each one)
You can experiment with lots of leftovers, but a handful are consistently successful for beginners. The general rule: scraps that already have a growth point (like a crown, base, or roots) are the ones most likely to cooperate.
Quick setup you’ll use for most scraps: a clear glass or jar, room-temperature water, a bright window (ideally several hours of light), and a habit of changing water regularly. If you’ve ever kept cut flowers and noticed the water gets funky, it’s the same idea—fresh water keeps bacteria down and roots healthier.
- Green onions (scallions): The fastest “success story” for most people.
- Romaine lettuce / leaf lettuce: Regrows new leaves from the core.
- Celery: Can sprout new inner stalks from the base.
- Basil and mint (from cut stems): Root in water and become new plants.
Here’s a simple reference chart for what to expect:
| Scrap to regrow | What you keep | Water level | First signs of growth | Best next step |
|---|---|---|---|---|
| Green onions | Bottom 1–2 inches with roots | Just covering roots, not the whole white stalk | 1–3 days | Keep in water or pot in soil for sturdier regrowth |
| Romaine/leaf lettuce | Bottom core (about 1–2 inches) | Shallow—just touching the bottom | 3–7 days | Move to soil if you want longer-lasting growth |
| Celery | Bottom base (2 inches) | Shallow—base sitting in 1/2 inch of water | 5–10 days | Pot in soil once roots/leaves appear |
| Basil (stem cutting) | 4–6 inch stem with a few leaves at top | Lower half in water; leaves above waterline | 7–14 days for roots | Pot in soil after roots are 1–2 inches long |
| Mint (stem cutting) | Similar to basil | Lower nodes submerged | 5–14 days | Pot in soil; pinch tips to encourage bushiness |
Green onions: the “I can’t believe this works” starter
Cut what you need, leaving about 1–2 inches of the white base with roots attached. Place it in a glass so the roots are in water. Keep most of the white part above water to reduce sliminess.
In a bright window, you’ll often see growth within a day or two. Harvest by snipping the green tops, leaving the base intact. If they start looking thin and tired after repeated harvests, that’s your cue to pot them in soil so they can feed themselves better.
Real-life scenario: You make ramen on a Wednesday. You don’t have fresh garnish. The scallions in the jar have grown two inches since Monday. You snip a handful and suddenly your “sad desk dinner” looks like you tried.
Lettuce: great for fun regrowth, limited for full heads
Romaine and other leaf lettuces can regrow leaves from the base. Save the bottom core (about 1–2 inches). Set it in a shallow dish with a small amount of water—just enough that the cut bottom stays wet. Too much water can cause rot.
New leaves tend to emerge from the center. You won’t usually get a full new romaine head like the grocery store version, but you can get tender leaves for sandwiches and small salads. If you want it to keep going longer, move it to soil once you see new growth and small roots.
Celery: slow at first, then surprisingly satisfying
Celery regrowth is a patience project. Keep the bottom base and place it in shallow water. In about a week, you’ll often see small yellow-green leaves in the center. Once it shows roots and a bit of leafy growth, plant it in soil with the top exposed.
Celery grown this way tends to be smaller and sometimes stronger-flavored than store celery, but the novelty (and crunch) makes it worth trying.
Basil and mint: “scraps,” but really cuttings
If you buy basil or mint in bunches, you can often root stems in water. Choose healthy stems, remove leaves from the lower half, and place the stem in a jar so the bare nodes are submerged. Keep leaves above water.
Change the water every few days. When roots are 1–2 inches long, pot them in soil. Basil loves warmth and sun; mint is famously enthusiastic—great if you want lots of mint, less great if you plant it outdoors without boundaries.
How to keep your jars from turning into a science experiment
Most kitchen-scrap regrowing “fails” are not mysterious. They usually come down to three issues: too much water, not enough light, or dirty water that encourages rot. The fixes are simple, and once you get them into your routine, countertop regrowing becomes almost automatic.
1) Use less water than you think
A common mistake is submerging the whole base because it feels “safer.” In reality, many scraps only need their roots or very bottom edge wet. When the cut surfaces sit underwater, they can turn mushy. Aim for:
- Onions/scallions: water covers roots only.
- Lettuce/celery bases: shallow water that wets the bottom.
- Herb cuttings: submerge nodes, keep leaves dry.
2) Light is the difference between “green and perky” and “pale and floppy”
Plants can regrow a little using stored energy, but they need light to keep producing new tissue. If your regrowth looks long, thin, and pale, it’s stretching for light the way a person might squint toward a streetlamp. A bright windowsill helps; rotate jars every couple of days so growth stays straighter.
If you don’t get much natural light, a small LED grow light can make a big difference. You don’t need a complicated setup—just enough brightness to mimic a sunny window.
3) Change water often (and rinse the jar)
Stagnant water invites bacteria, smells, and slimy stems. A good baseline is changing the water every 2–3 days, or daily if your kitchen is warm. When you change it, give the jar a quick rinse. If something smells “off,” treat that as your early warning system.
4) Know when water is not enough: the “potting-up” moment
Water regrowth is like living on snacks. It works for a while, but to thrive, most plants eventually need nutrients and support from soil (or hydroponic nutrients, if you go that route).
Move to soil when:
- Roots are clearly visible and growing (especially for herbs).
- New leaves appear but then stall or get smaller.
- The plant keeps tipping over in water.
Simple potting method: Use a small pot with drainage holes, fill with regular potting mix, moisten it, and plant the rooted scrap/cutting so roots are covered. Keep it slightly moist for the first week, like you’re helping it “settle in.”
5) Food safety and “can I eat this?” common sense
Regrown greens are generally treated like any fresh produce: rinse before eating. Avoid eating regrowth that’s slimy, smells bad, or shows mold. If you used a scrap that was already old or questionable in the fridge, it won’t become safer in a jar of water—start with fresh, healthy pieces.
They’ll regrow multiple times, but the stalks often get thinner over repeated harvests—especially if kept only in water. Potting them in soil usually extends their useful life because they can take up nutrients.
They’ll regrow multiple times, but the stalks often get thinner over repeated harvests—especially if kept only in water. Potting them in soil usually extends their useful life because they can take up nutrients.
Usually too much water or water that isn’t changed often enough. Keep the water shallow (just wetting the base), refresh it every couple of days, and make sure the core gets bright light and airflow.
Usually too much water or water that isn’t changed often enough. Keep the water shallow (just wetting the base), refresh it every couple of days, and make sure the core gets bright light and airflow.
You can sprout them, but they’re a different project. Onion and garlic can grow greens, but growing full bulbs takes time and space. Potatoes sprout easily, but growing potatoes indoors is more involved and better suited to containers with soil rather than a jar of water.
You can sprout them, but they’re a different project. Onion and garlic can grow greens, but growing full bulbs takes time and space. Potatoes sprout easily, but growing potatoes indoors is more involved and better suited to containers with soil rather than a jar of water.
A small “success routine” you can steal: If you want this to feel effortless, link it to something you already do. For example, every time you make coffee, glance at the jars. Top up water if it’s low. Every second coffee, change the water. It turns plant care into a background habit instead of a chore.
Where this fits in everyday life: Kitchen scrap gardening won’t replace your grocery store, but it can make weeknight cooking feel more alive. It’s also a surprisingly good gateway into bigger gardening. Once you’ve watched roots appear in a jar, buying a small pot and a bag of soil suddenly feels less intimidating—because you’ve already seen the plant’s “restart button” work right in front of you.